Manage Your Group‘s Basics Info & Members
This guide provides step-by-step instructions for managing your group's information and members on both PC and Mobile.
Viewing Group Basic Information
- 💻Desktop Users
- 📱Mobile Users
- Locate and select the desired group from your chat list.
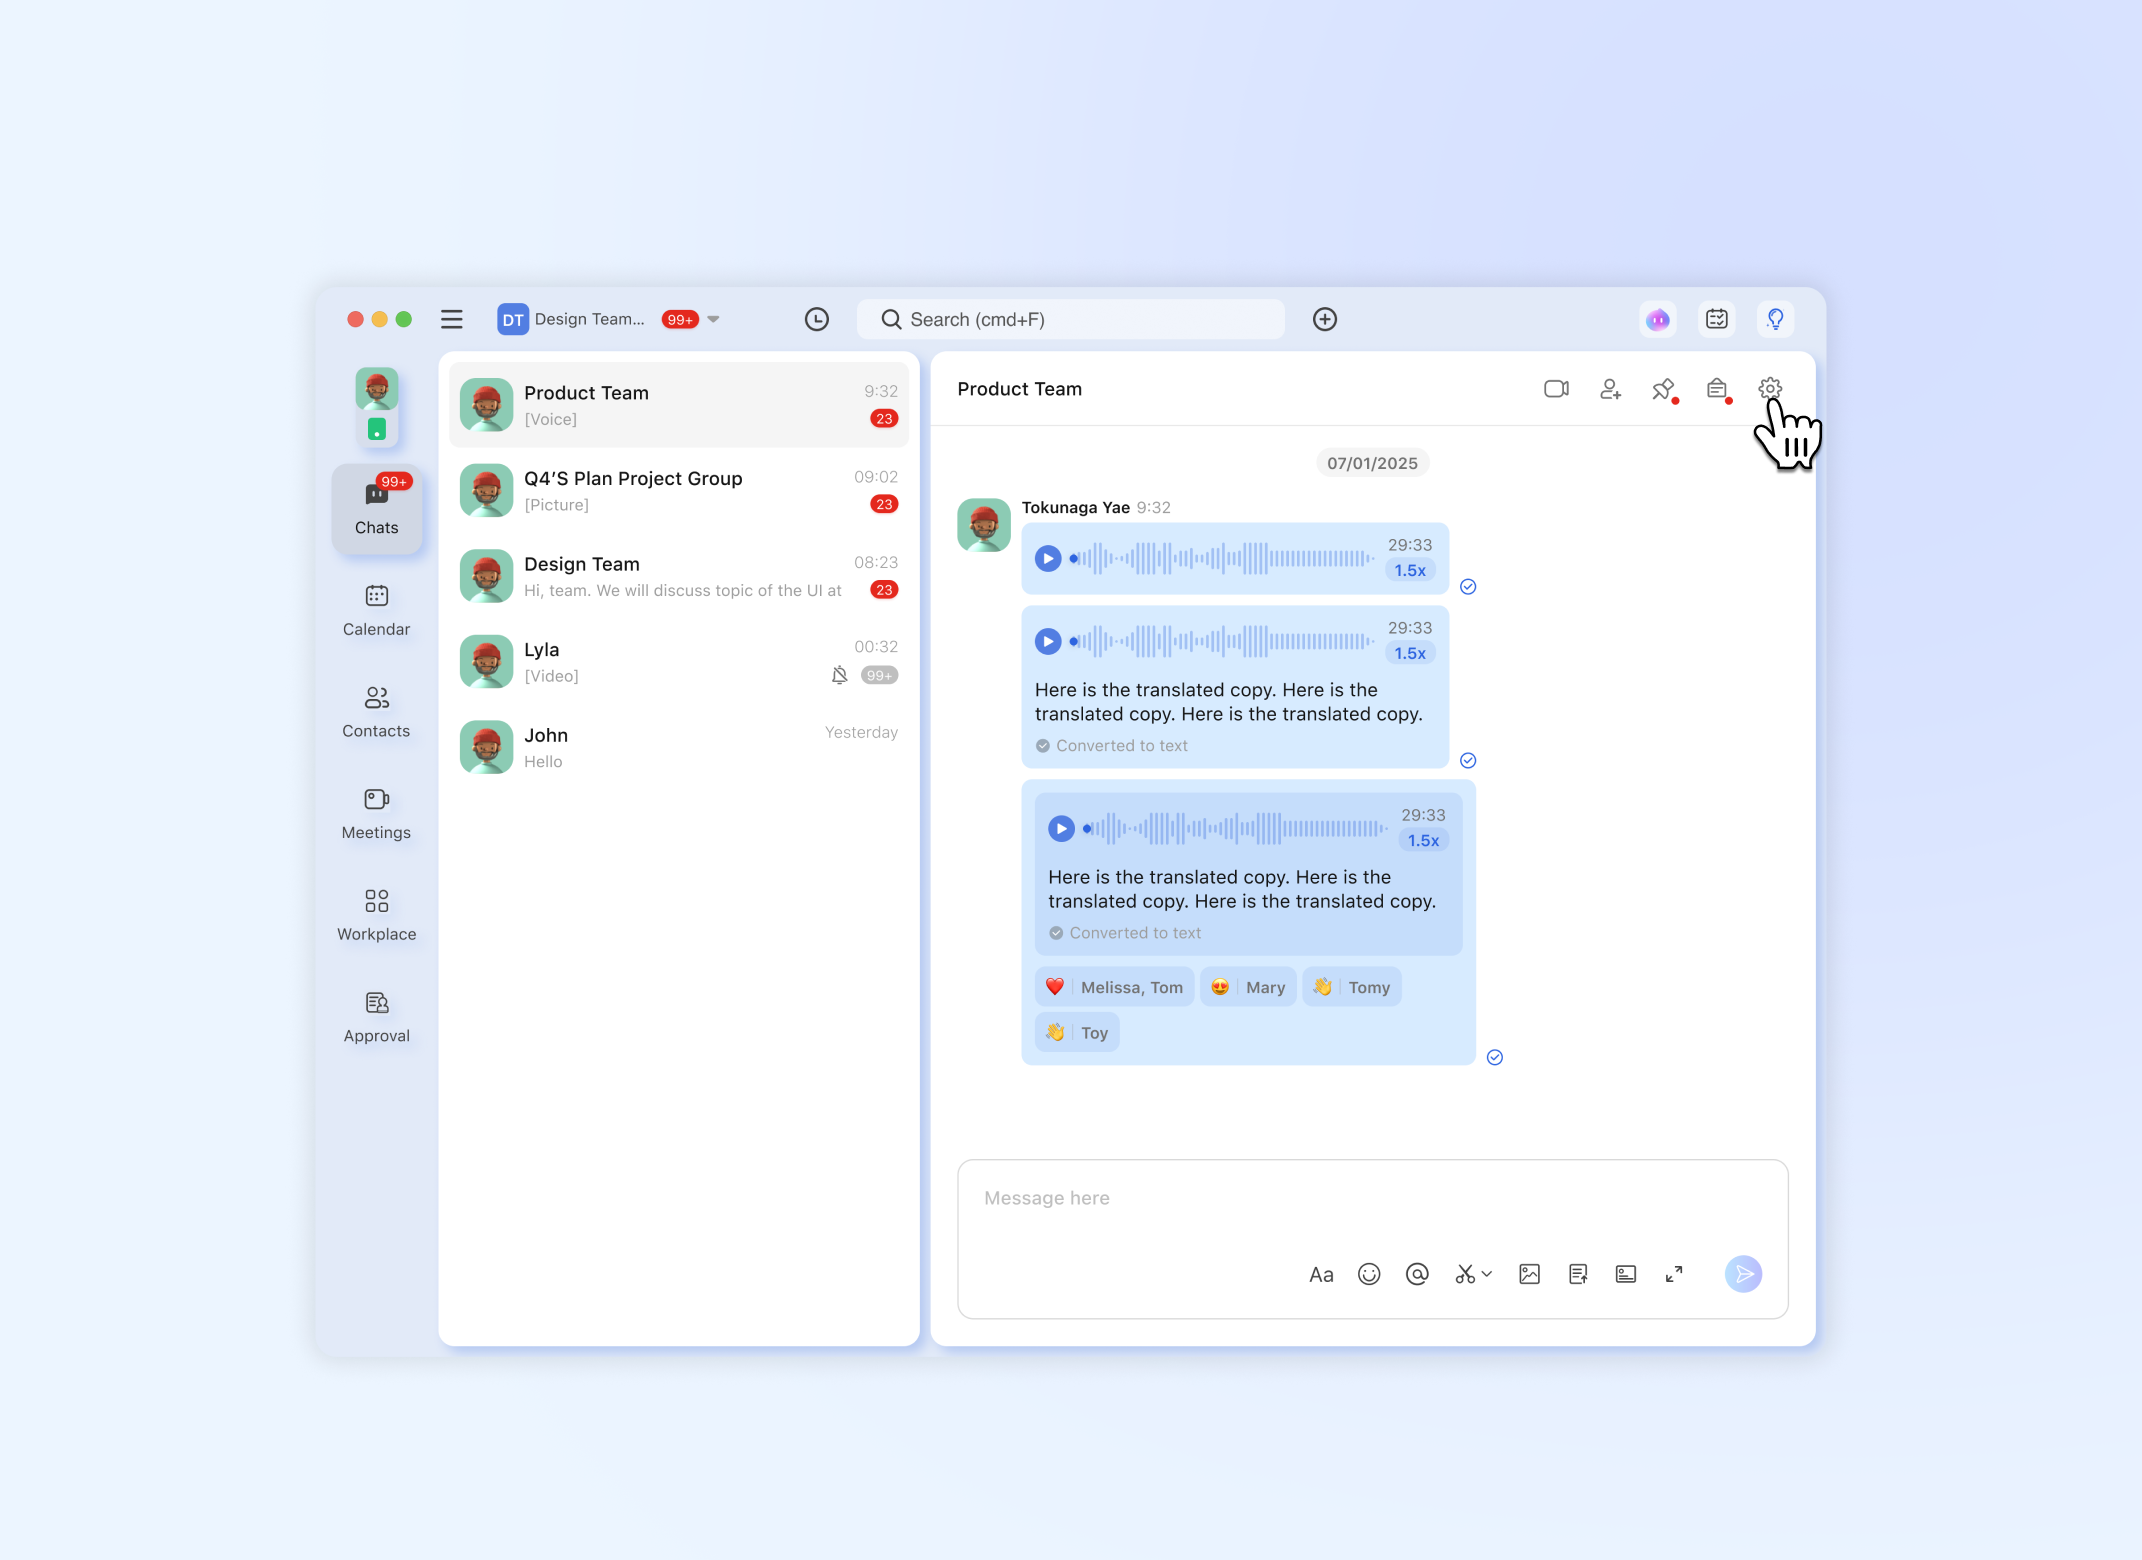
- Click the Settings (gear icon ⚙️) button in the top-right corner of the group chat window.
- This will open the Group Information panel, where you can view the group name, description, and member list.
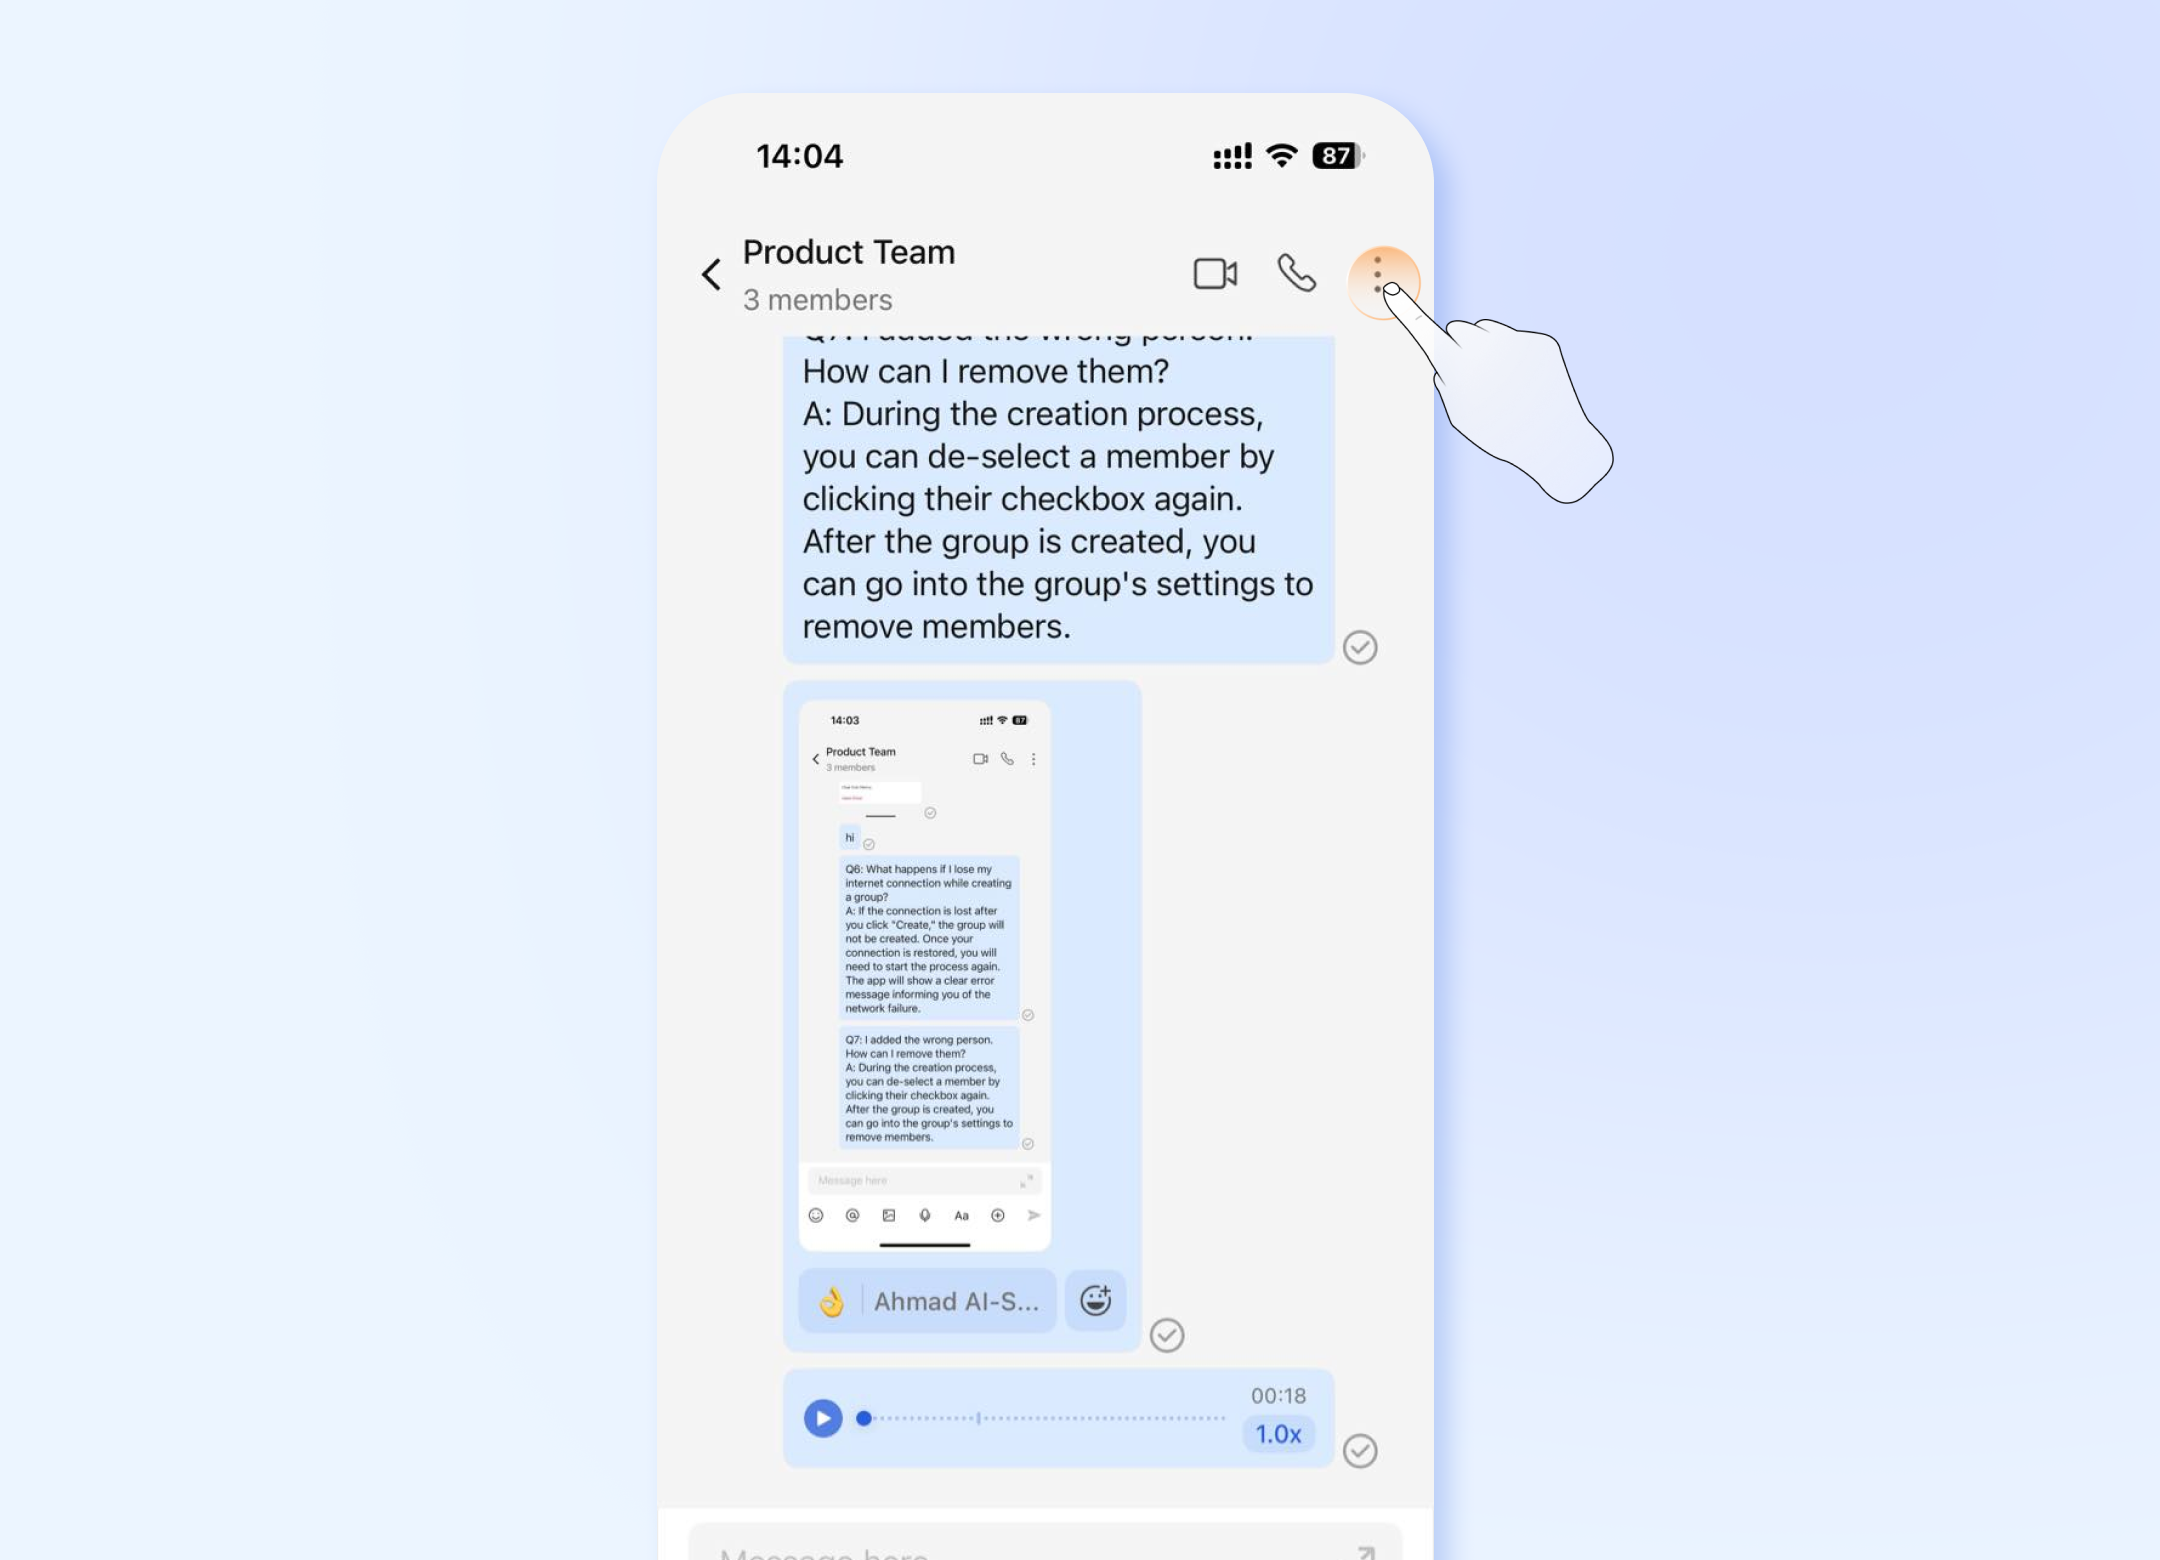
- Open the desired group chat.
- Tap the ⋮ icon
- This will open the Group Information page, where you can view the group name, description, and member list.
Editing Group Name and Description
- 💻Desktop Users
- 📱Mobile Users
Note: Usually, only the group owner and administrators have permission to edit this information.
- Follow steps in Section 1 to open the Group Information panel on PC.
- Click the Edit (pencil icon ✏️) button next to the group's name or description.
- A pop-up window will appear. You can now:
- Edit the Group Name (max. 40 characters).
- Edit the Group Description (max. 500 characters).
- To save changes, click Save. To cancel without saving, click Cancel or close the pop-up window.
Note: Usually, only the group owner and administrators have permission to edit this information.
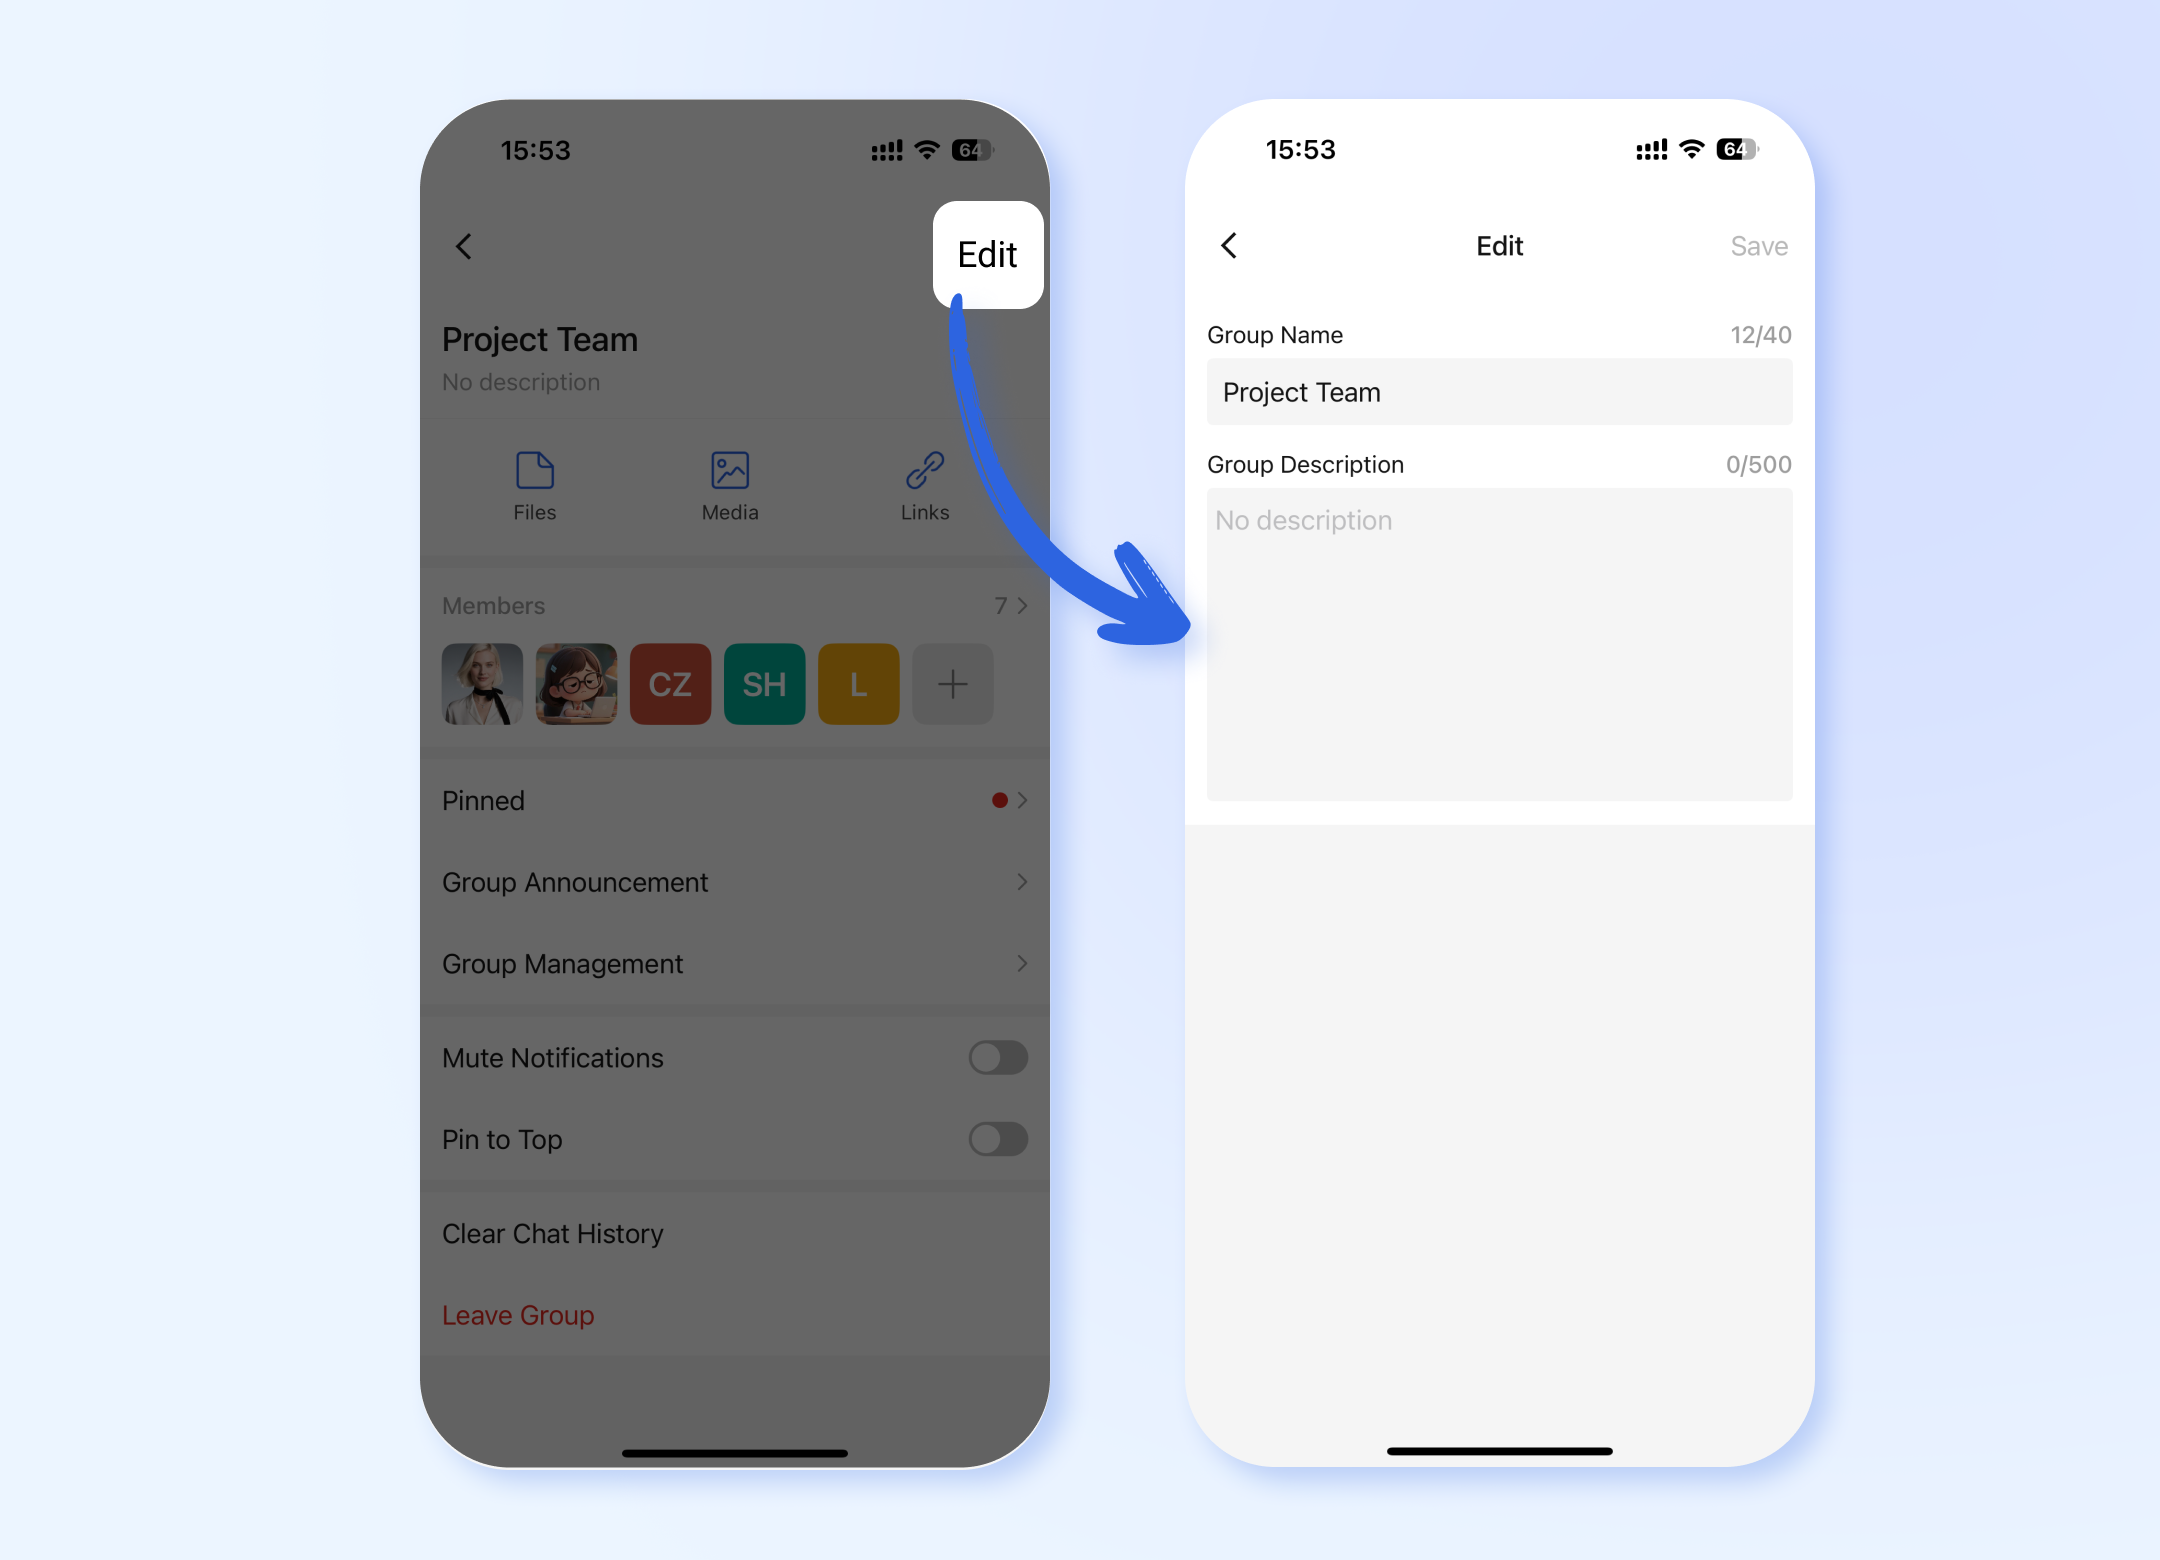
- Follow steps in Section 1 to navigate to the View Group Info screen on Mobile.
- Tap the Edit button in the top-right corner.
- You will enter the editing screen. You can now:
- Edit the Group Name (max. 40 characters).
- Edit the Group Description (max. 500 characters).
- To confirm changes, tap Save in the top-right corner. To discard changes, tap Back or cancel.
Adding New Members
- 💻Desktop Users
- 📱Mobile Users
Via the Top Menu Bar (Quick Action)
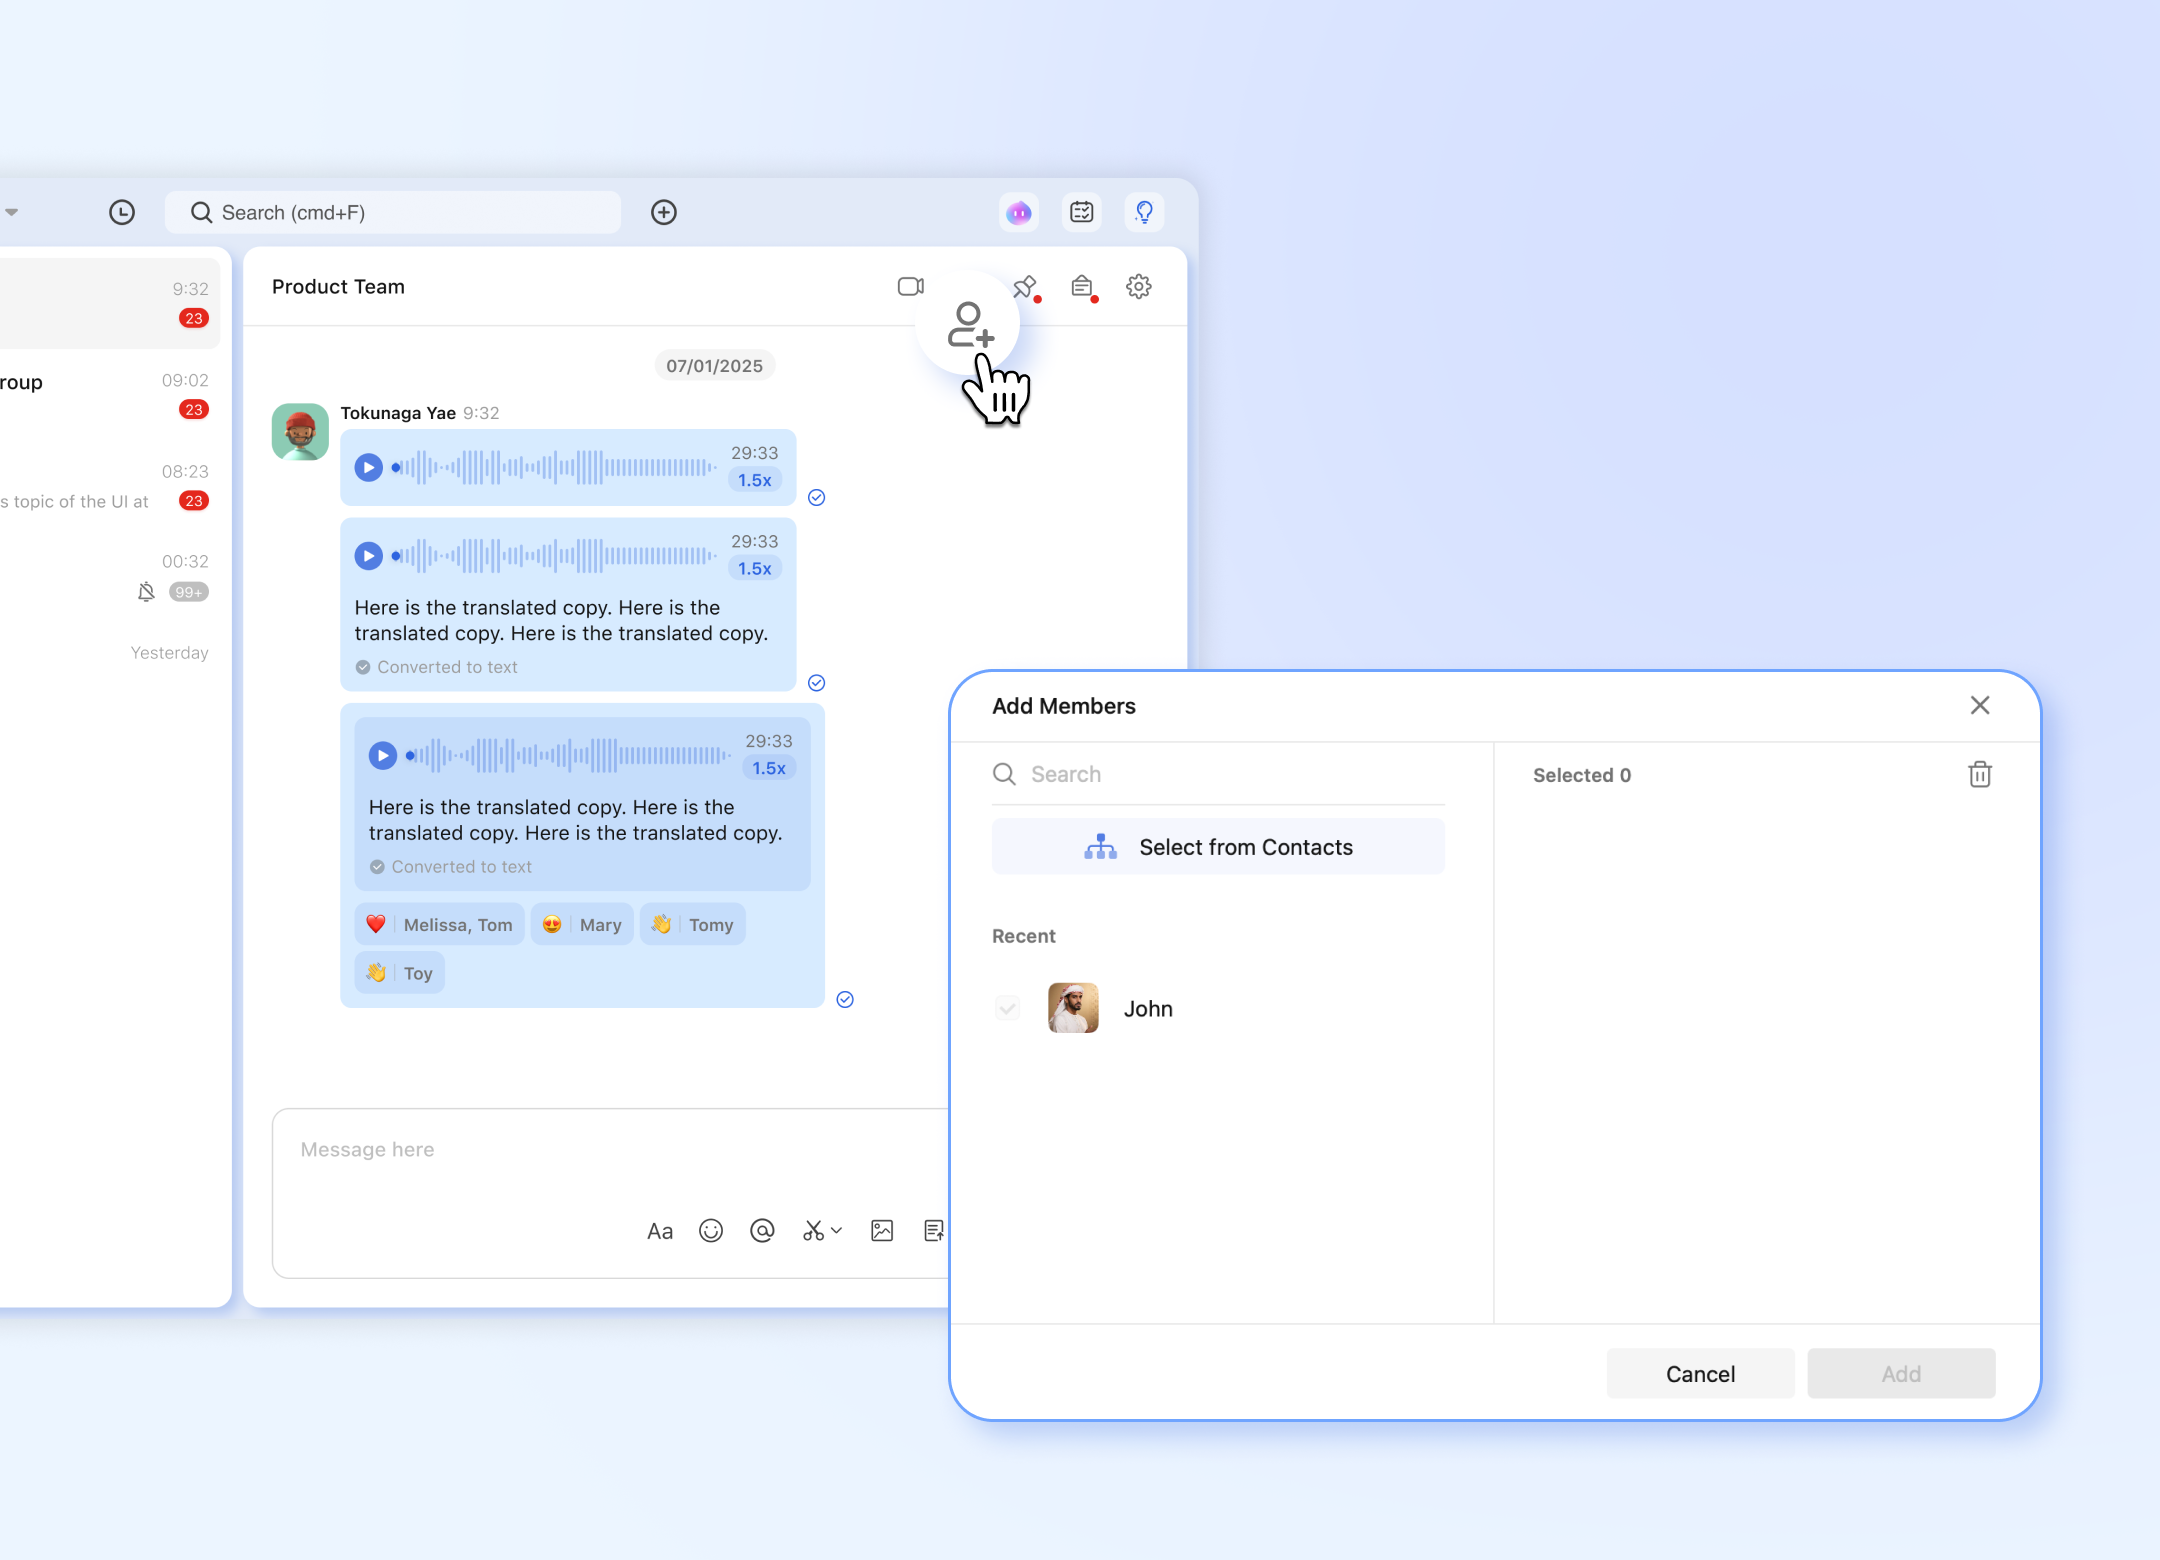
- While in the group chat window, look at the top menu bar.
- Click the Add Members button
- This will directly launch the corporate address book window.
- Select members and click Add to invite them.
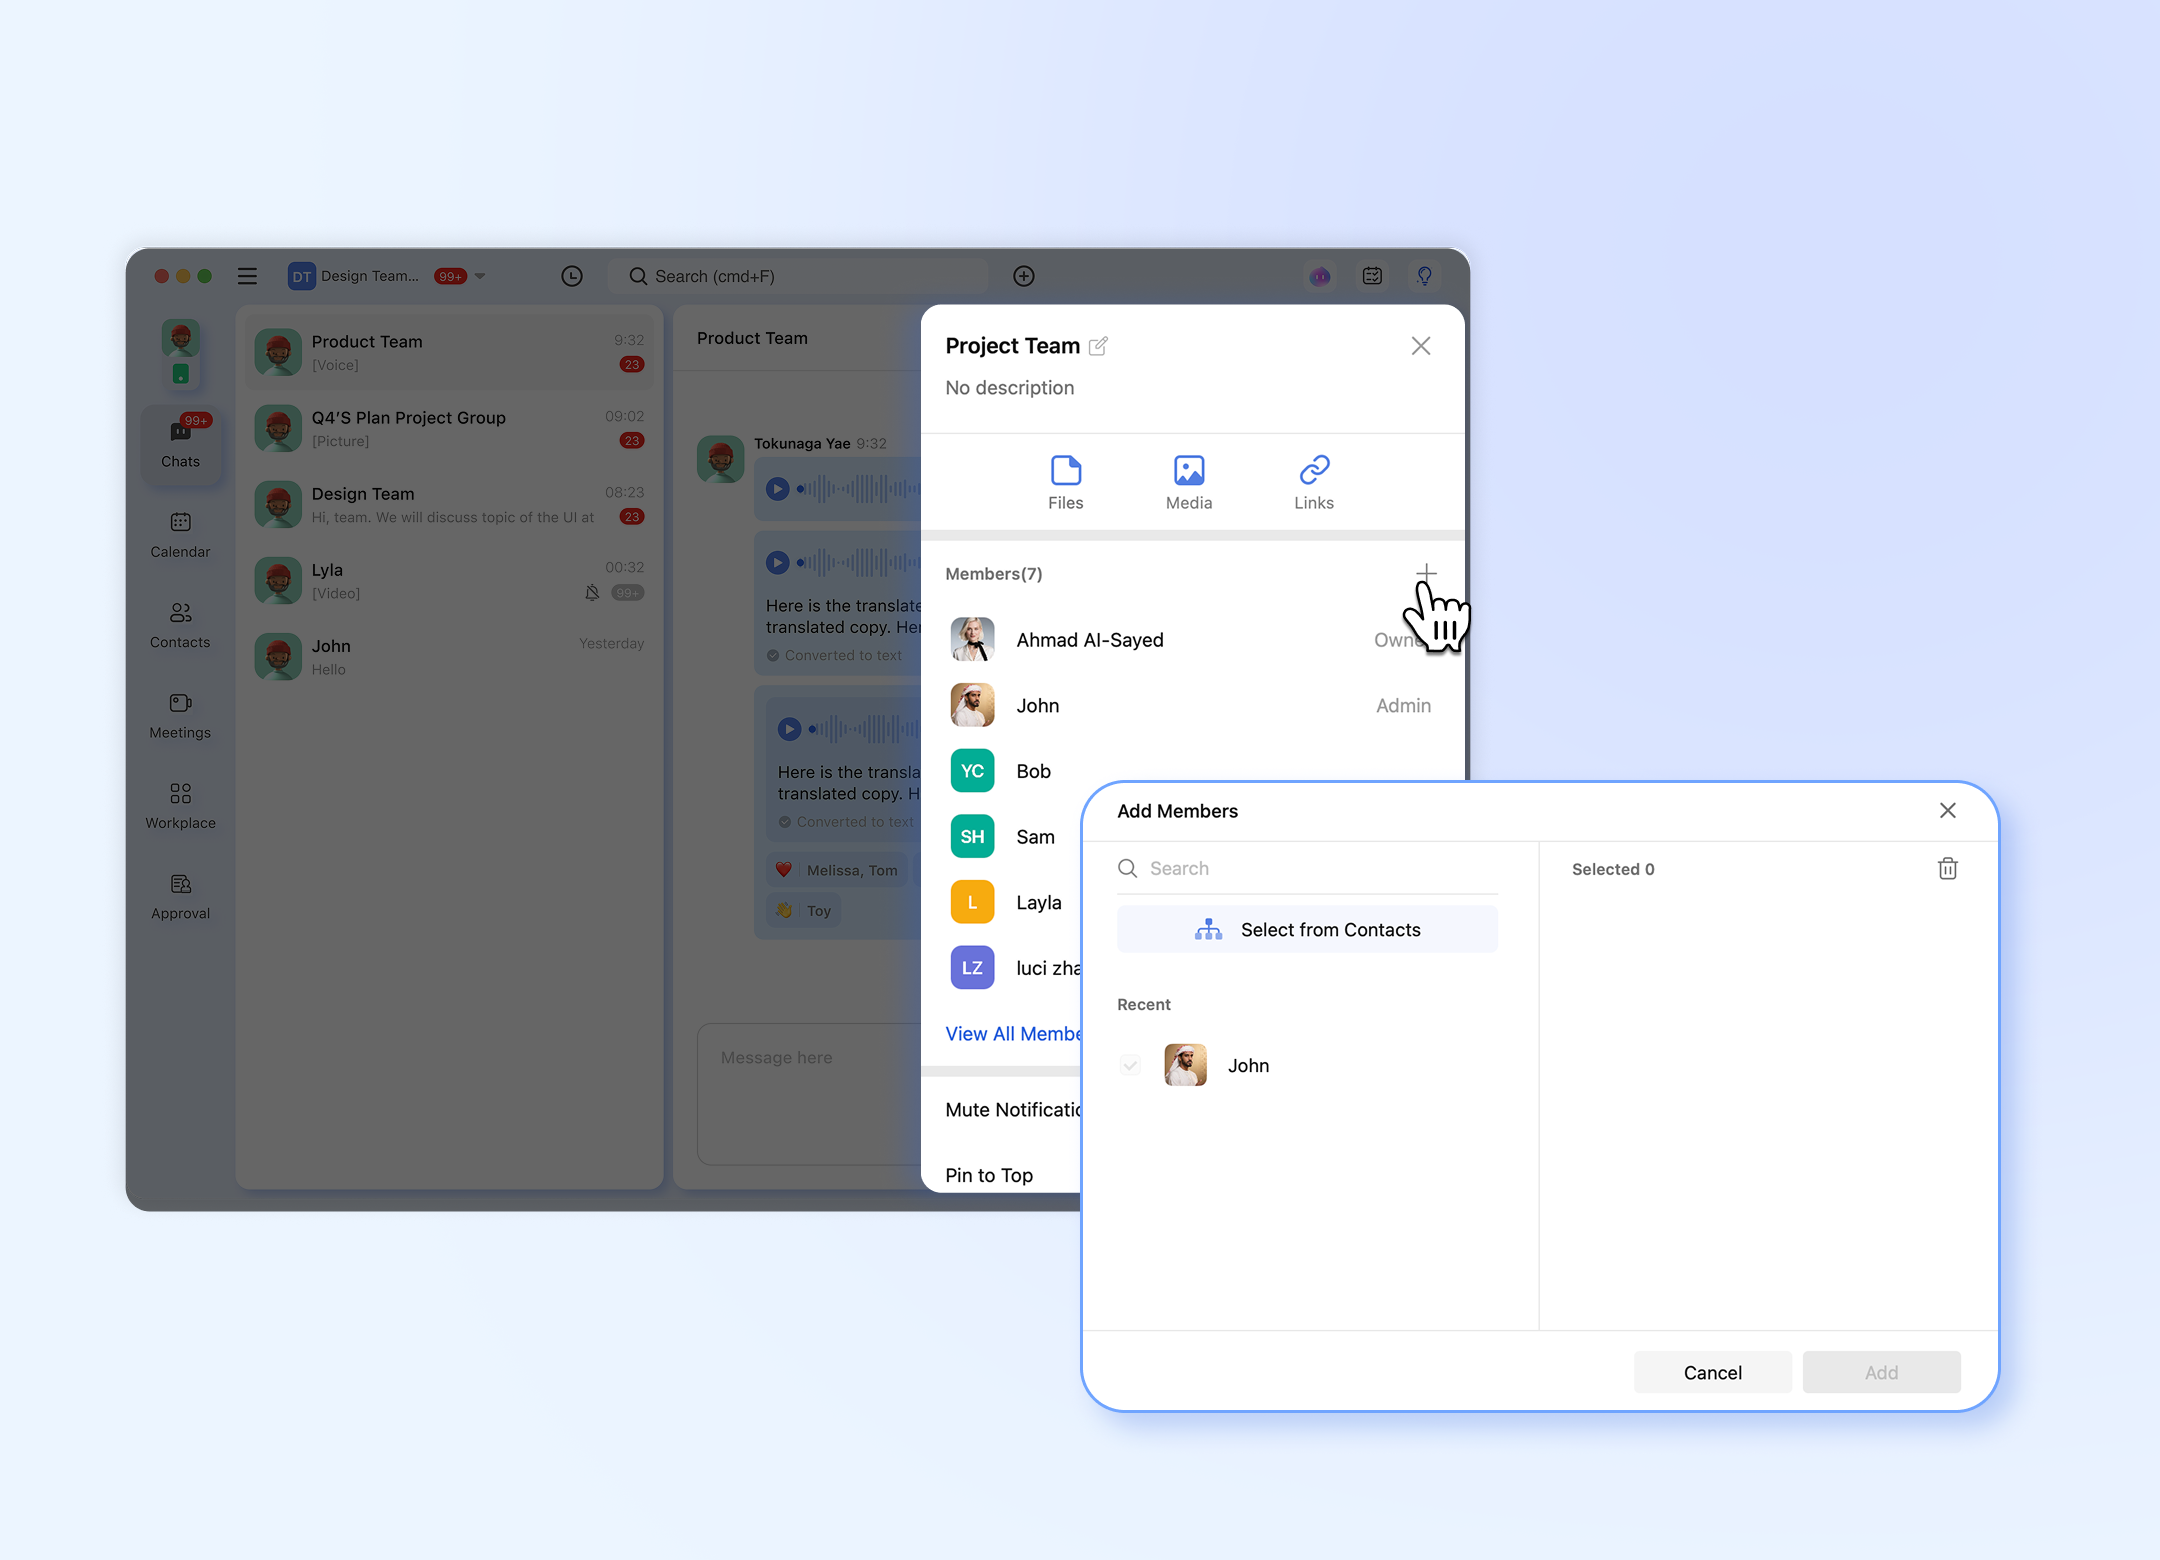
Via the Group Information Panel
- In the Group Information panel, locate the Members section.
- Click the Add (+) button.
- This will directly launch the corporate address book window.
- Select members and click Add to invite them.
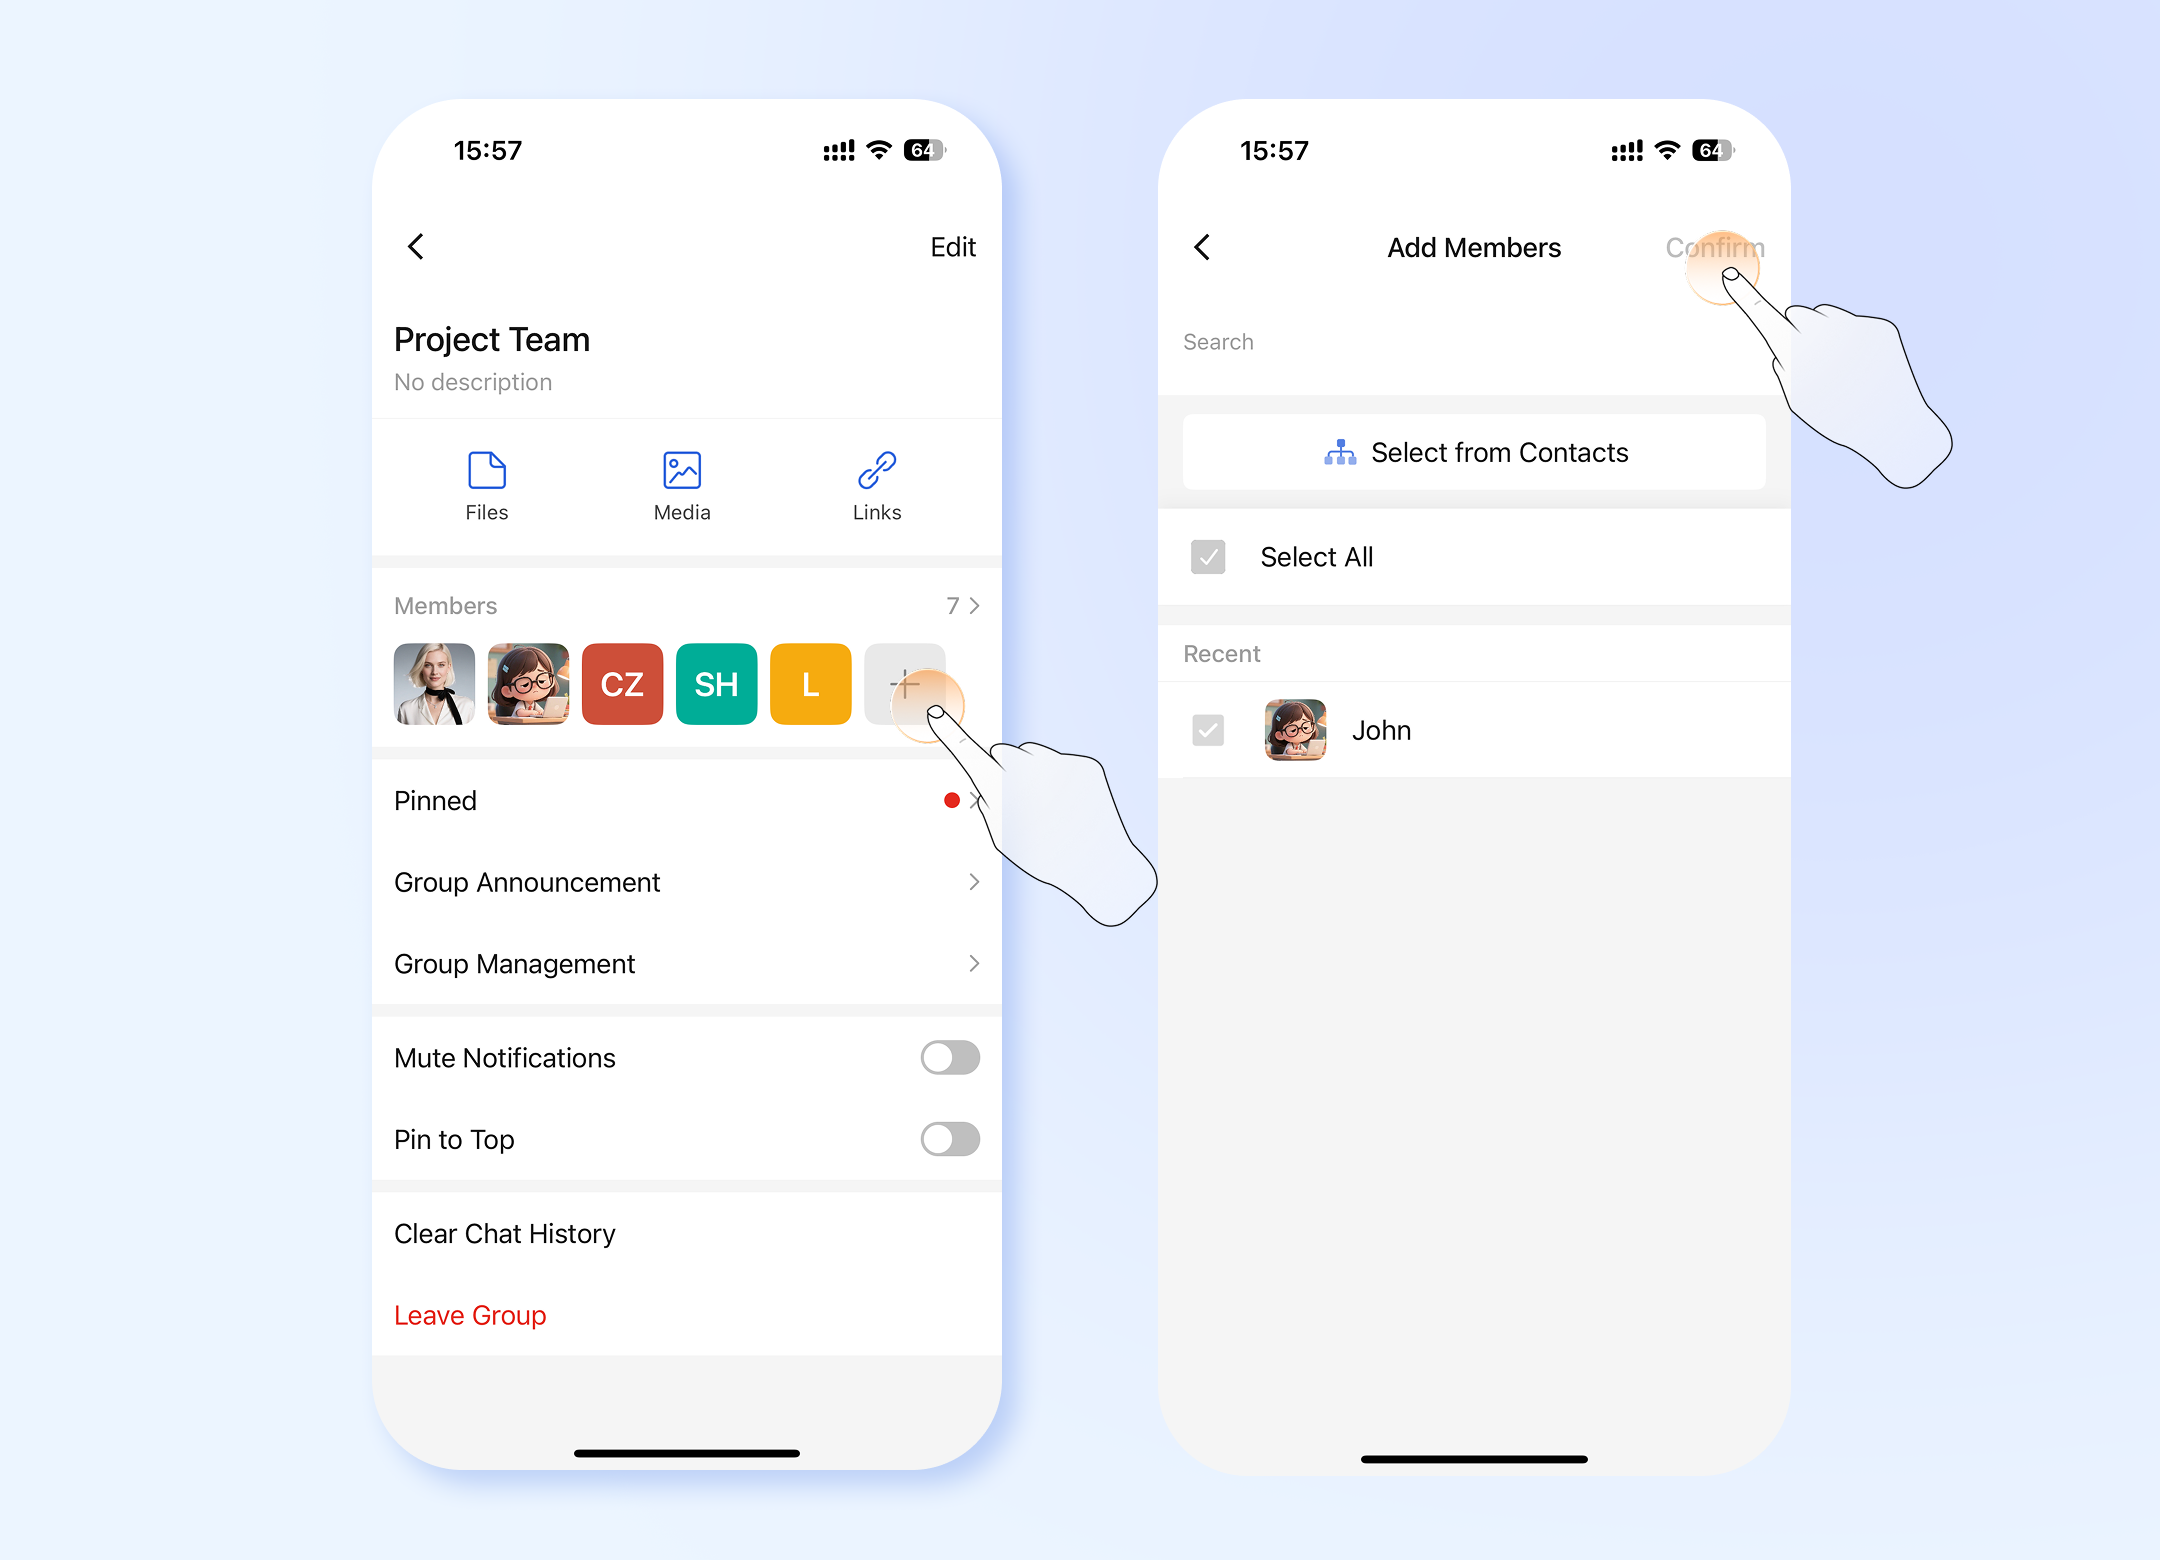
- In the View Group Info screen, find and tap on Members.
- Tap the Add (+) button.
- You will be redirected to your contact list or corporate directory.
- Select the contacts you wish to add.
⚠️Please use the 'Select All' option with extreme caution. Only use it if you are certain the group is intended for all employees.
- Tap Confirm to send the invitations.
Removing Members
- 💻Desktop Users
- 📱Mobile Users
Note: Typically, only the group owner and administrators can remove members.
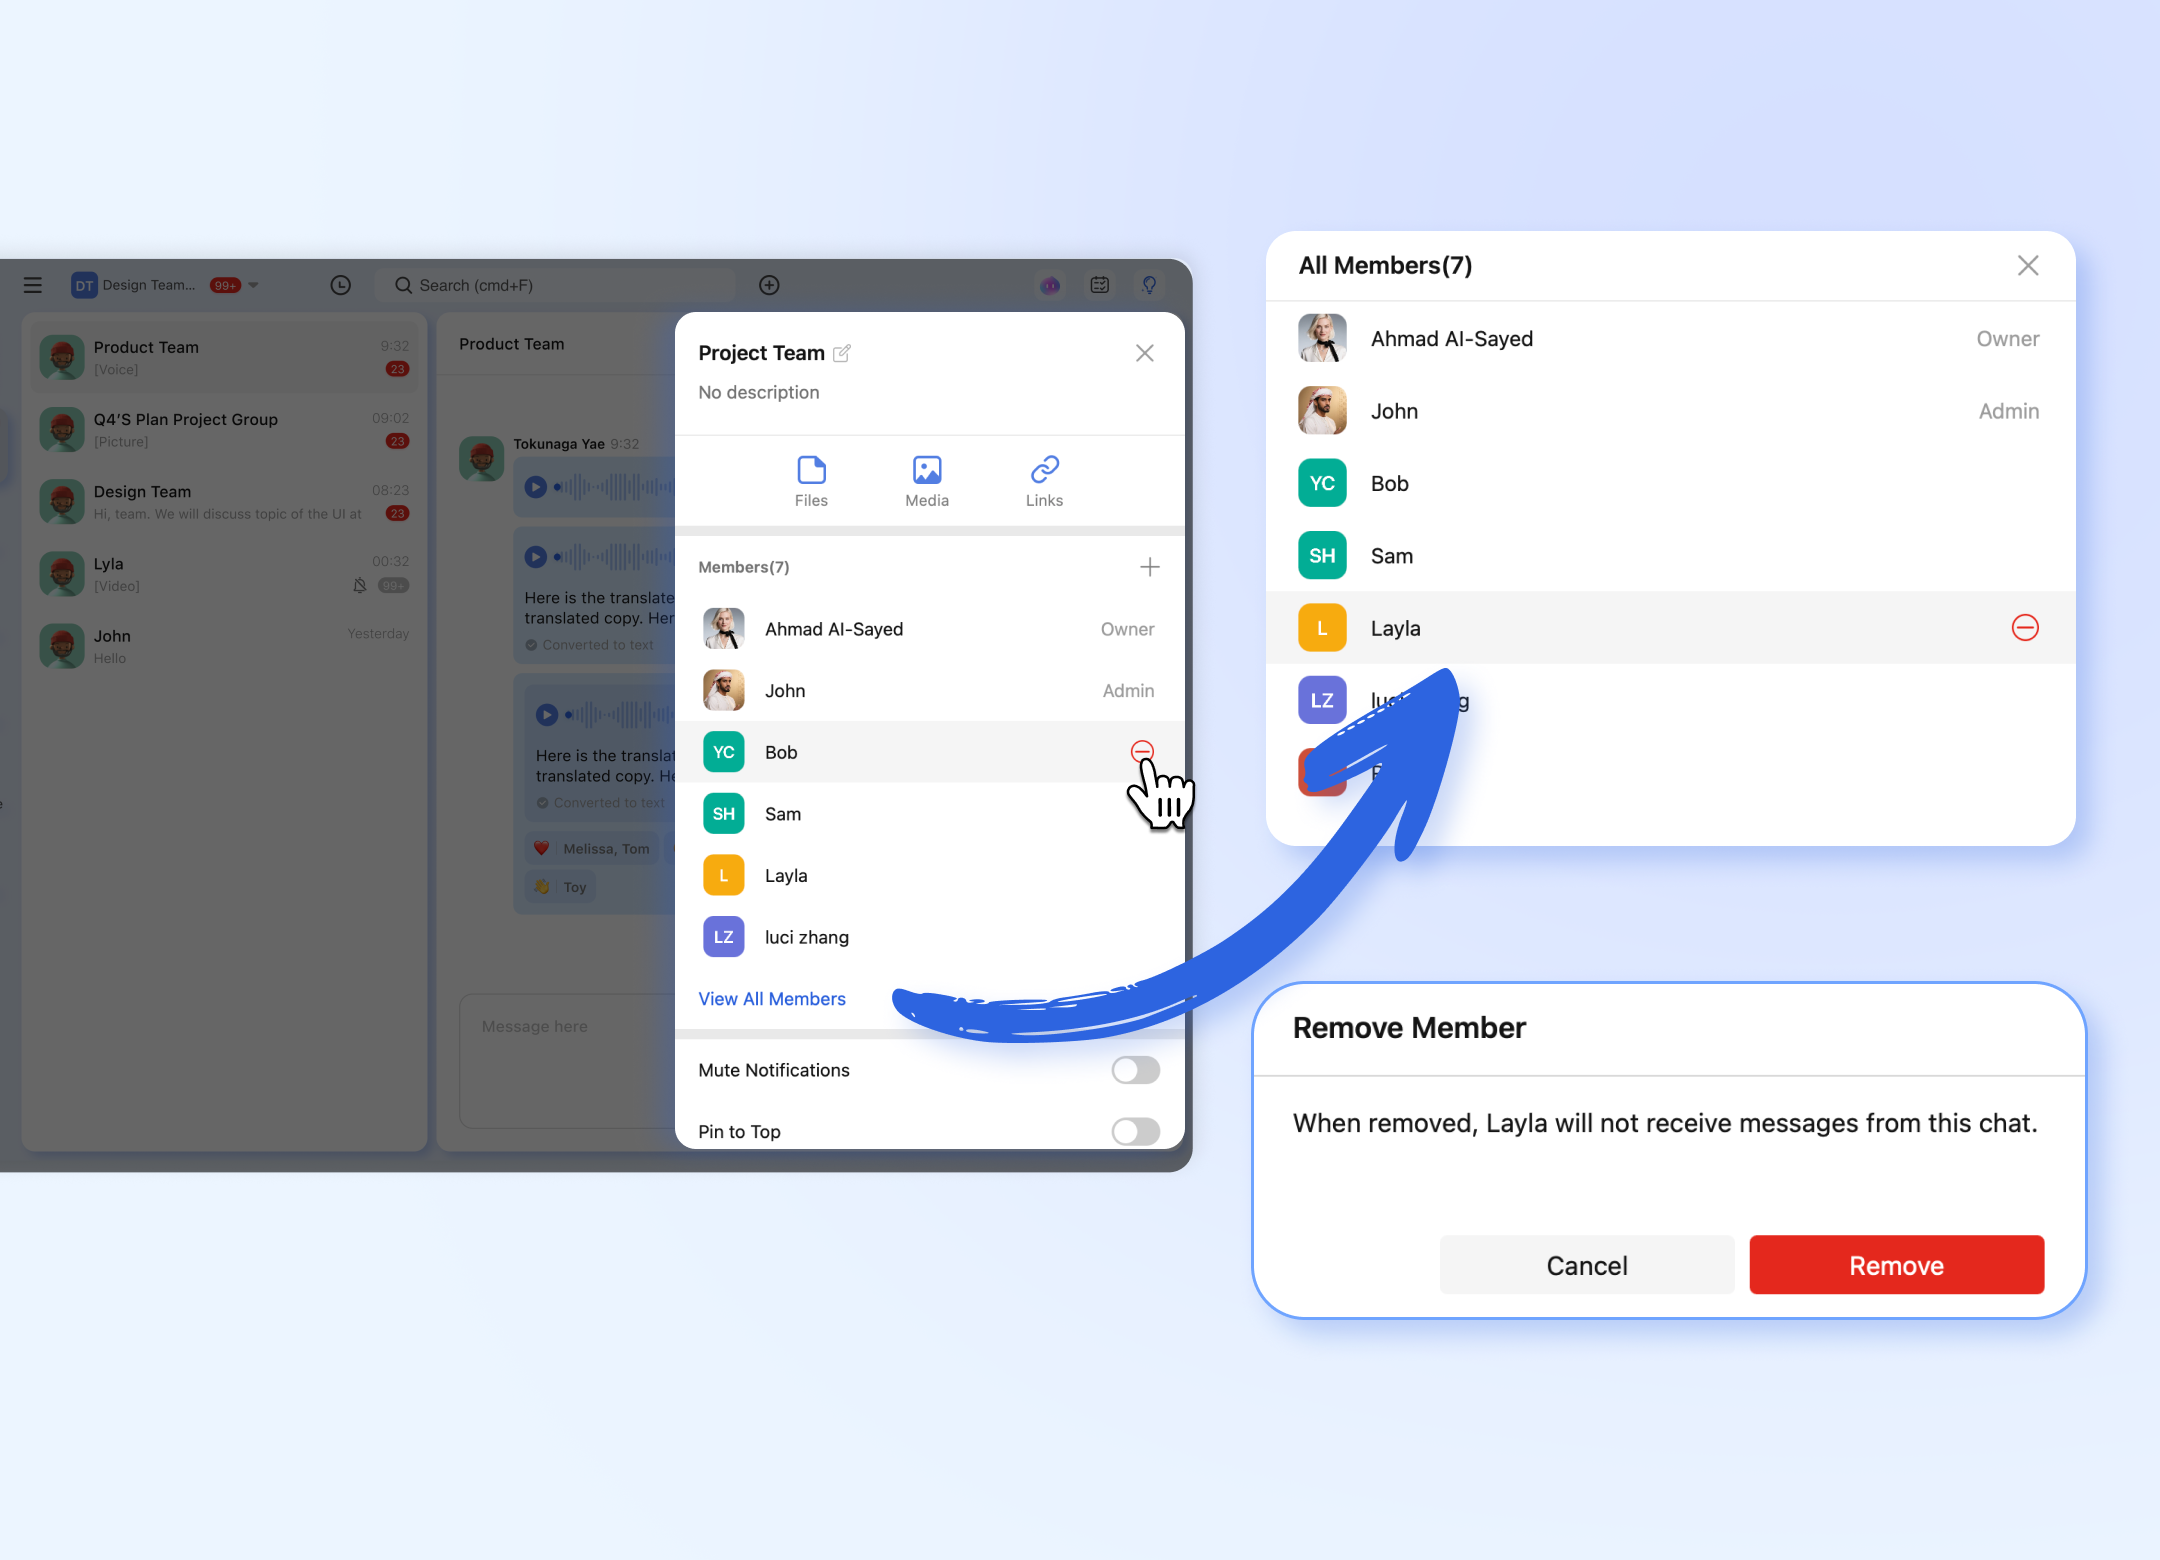
- In the Group Information panel, find the member you wish to remove in the Members list.
- Hover your mouse over the member's name. A Remove (-) button will appear.
- Click the - button.
- A confirmation dialog will pop up. Click Remove to remove the member from the group.
Note: Typically, only the group owner and administrators can remove members.
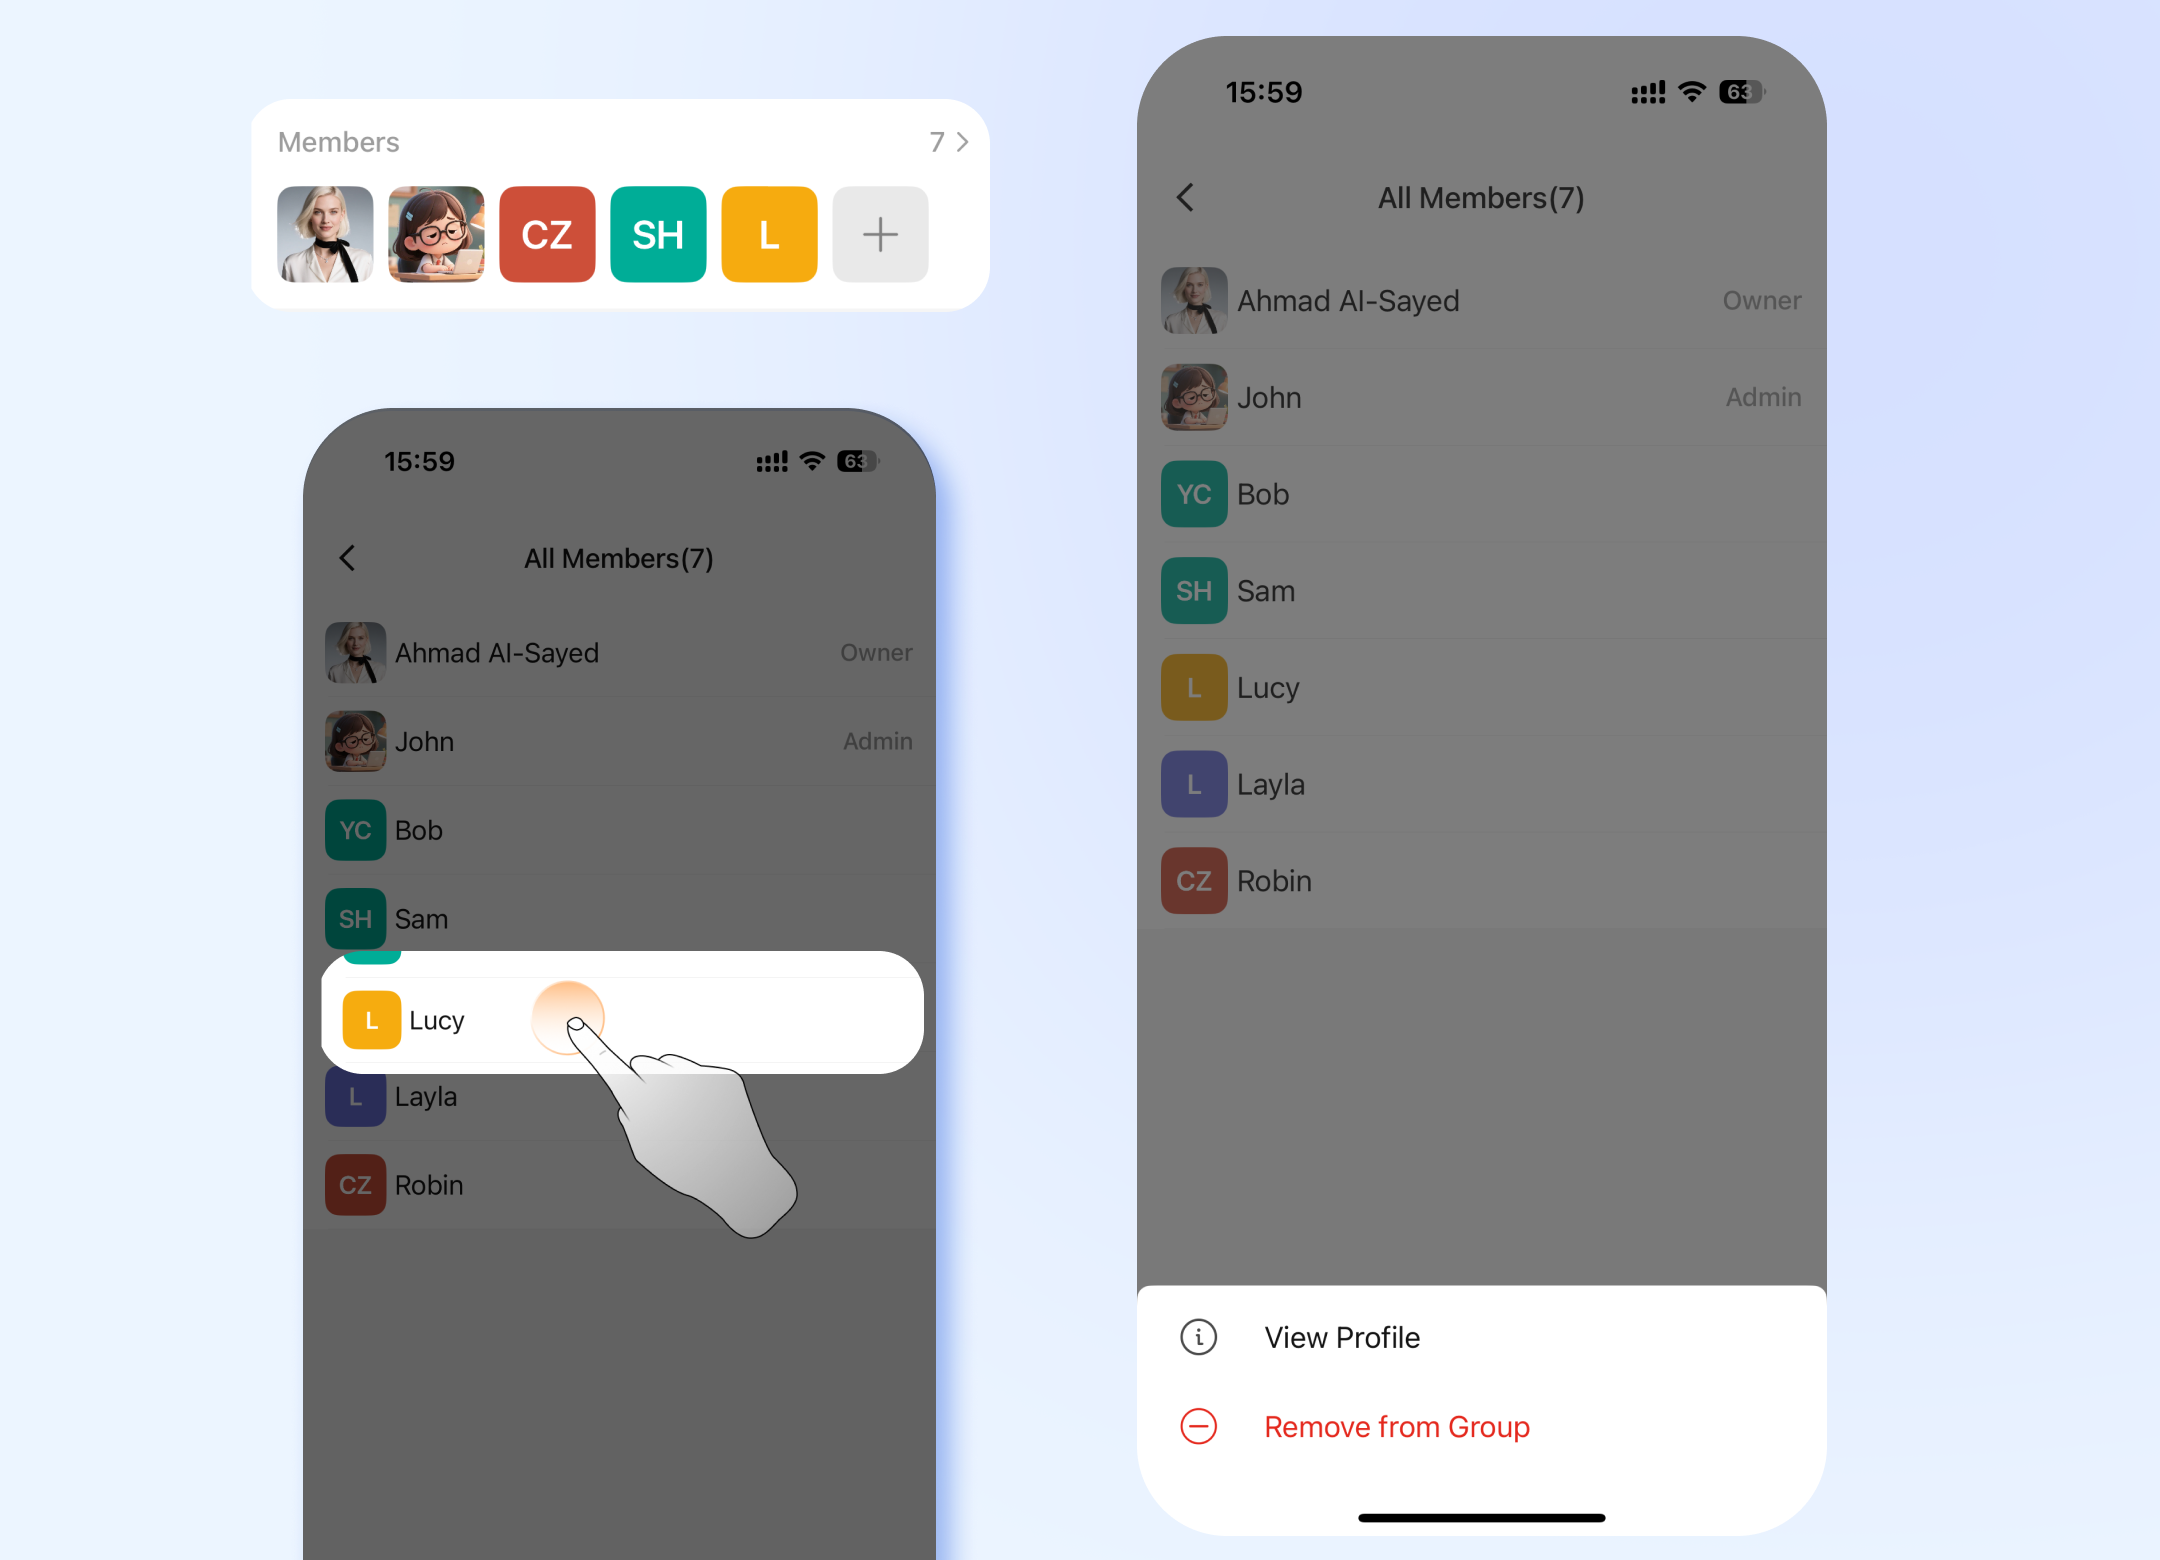
- In the View Group Info screen, tap on Members.
- Scroll to find the member you want to remove.
- Tap directly on the member's name. This will open a profile card or action sheet.
- Tap Remove from Group.
- A confirmation alert will appear. Tap Confirm to finalize the removal.
Frequently Asked Questions (FAQ)
Q1: Why can't I edit the group name or description?
A: This functionality is typically restricted to group owners and administrators. Please contact your group owner if you need changes made.
Q2: What happens if I exceed the character limit for the group name?
A: The input field will not allow you to type beyond the limit (40 for name, 500 for description). The Save button may also remain disabled until you reduce the character count.
**Q3: I accidentally removed a member. What should I do?**A: Simply follow the steps in Section 3 to re-invite them to the group.
Pro Tip: The Add Members button in the top menu (PC) is the quickest way to grow your group without navigating to the settings panel.